Step-by-Step Cinnamon Crunch Bagel Recipe
Master homemade bagels with this step-by-step cinnamon crunch bagel recipe! Complete guide with tips, tricks & delicious results.

Holy moly, there's nothing quite like the smell of fresh bagels baking in your own kitchen! If you've ever wondered whether making bagels at home is worth the effort, let me tell you – it absolutely is. This Step-by-Step Cinnamon Crunch Bagel Recipe is about to become your new weekend obsession, and honestly, once you taste these babies, you'll never want to buy store-bought bagels again.
Now, I won't sugarcoat it – making bagels from scratch isn't exactly a quick weeknight project. But here's the thing: it's way more manageable than you might think, and the results? Absolutely mind-blowing! We're talking about chewy, golden bagels with a gorgeous cinnamon crunch topping that'll make your neighbors suddenly very friendly.
Whether you're a seasoned baker or someone who's never made bread before, this recipe breaks everything down into simple, foolproof steps. Plus, I'll share all my hard-learned tricks to help you avoid the common pitfalls that can turn bagel dreams into bagel nightmares. So roll up your sleeves, clear some counter space, and let's dive into this delicious adventure together!
Understanding the Magic Behind Perfect Bagels
What Makes a Bagel Actually... Well, a Bagel?
Here's where things get interesting – bagels aren't just round bread with holes in the middle. Nope, they've got their own special personality that comes from a unique two-step cooking process. First, they take a quick dip in boiling water (yeah, seriously!), then they hit the oven for that perfect golden finish.
This boiling step is what gives bagels their signature chewy texture and shiny exterior. Without it, you'd basically end up with dense, sad bread rolls. The boiling water creates a thin skin on the outside while keeping the inside tender and chewy – it's like magic, but with science!
The dough itself is pretty straightforward, but it's denser and less sweet than regular bread dough. That's because bagels are meant to be substantial – they're the kind of breakfast that sticks with you through a busy morning, not something that'll leave you hungry an hour later.
The Cinnamon Crunch Factor
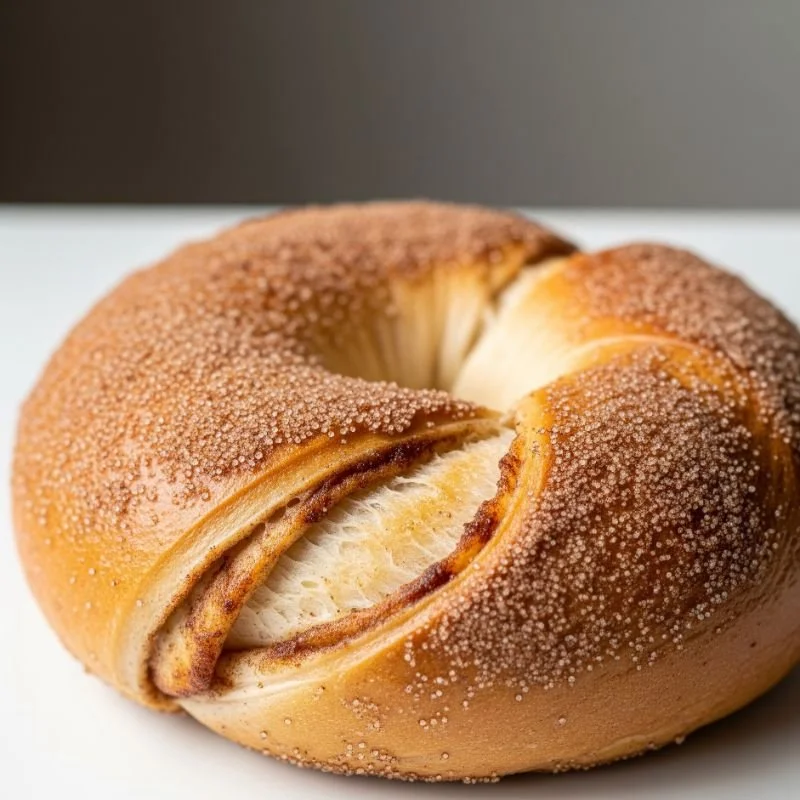
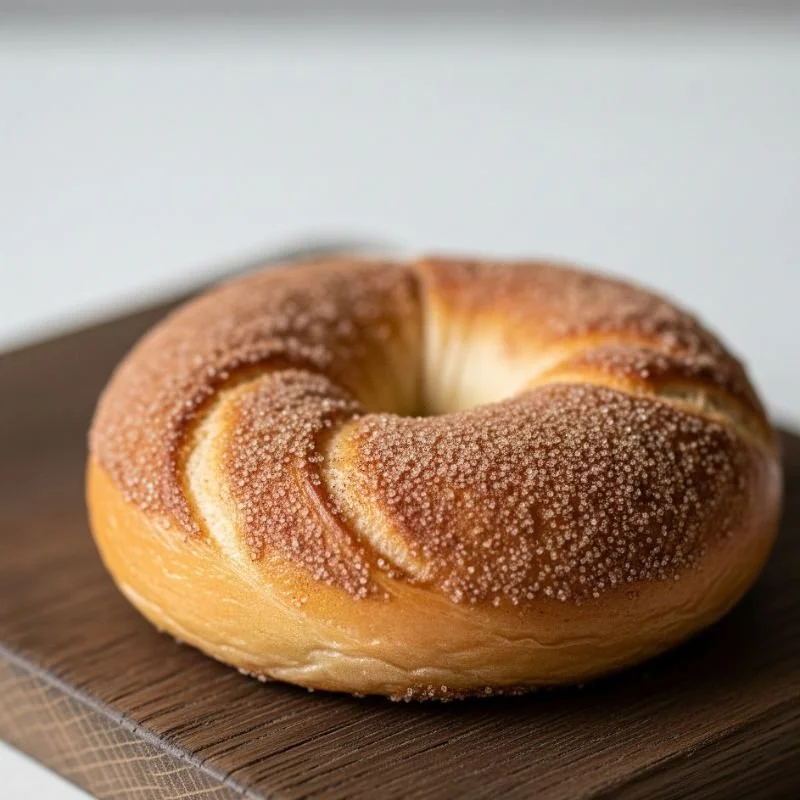
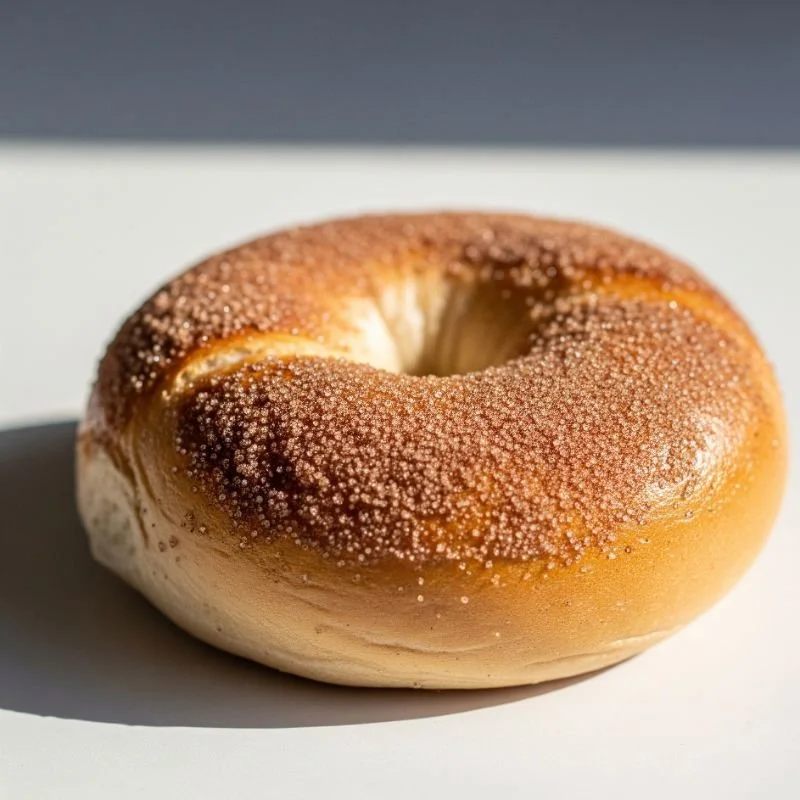
Now, let's talk about what makes this particular bagel recipe special – that incredible cinnamon crunch topping! While traditional bagels might just get a sprinkle of sesame seeds or poppy seeds, we're going all-out with a mixture that combines cinnamon, sugar, and a secret ingredient that creates the most amazing texture.
The key is getting the right balance of sweetness and spice, plus that satisfying crunch that doesn't fall off when you bite into it. Trust me, I've experimented with countless variations to get this just right, and this combination is pure perfection.
Gathering Your Ingredients: The Foundation of Great Bagels
The Bagel Dough Essentials
Before we jump into the fun stuff, let's make sure you've got everything you need. The beauty of bagel-making is that the ingredient list is pretty simple – no fancy additives or hard-to-find items required!
For the Bagel Dough:
• 4 cups bread flour (this is important – don't substitute!)
• 1 packet (2¼ teaspoons) active dry yeast
• 1 tablespoon granulated sugar
• 1½ teaspoons salt • 1¼ cups warm water (around 110°F)
• 2 tablespoons vegetable oil
• 1 large egg (for egg wash)
For the Cinnamon Crunch Topping:
• ½ cup granulated sugar
• 2 tablespoons ground cinnamon
• 1 tablespoon brown sugar
• 1 teaspoon vanilla extract
• 2 tablespoons melted butter
• ¼ cup chopped pecans (optional, but amazing!)
For the Boiling Water Bath:
• 8 cups water
• 2 tablespoons honey or brown sugar
• 1 teaspoon baking soda
Why These Specific Ingredients Matter
Listen, I know it's tempting to make substitutions, but when it comes to bagels, some ingredients are non-negotiable. Bread flour has a higher protein content than all-purpose flour, which means more gluten development and that signature chewy texture we're after. All-purpose flour will work in a pinch, but your bagels won't have quite the same bite.
The honey or brown sugar in the boiling water isn't just for show – it helps create that beautiful golden color and adds a subtle sweetness that balances the savory dough. And that baking soda? It raises the pH of the water, which helps the bagels develop that classic shiny exterior.
The Step-by-Step Cinnamon Crunch Bagel Recipe: Let's Get Our Hands Dirty
Step 1: Waking Up the Yeast
First things first – we need to proof our yeast to make sure it's alive and kicking. In a small bowl, combine the warm water, sugar, and yeast. Give it a gentle stir and let it sit for about 5-10 minutes until it gets all foamy and bubbly.
If your mixture doesn't foam up, your yeast might be dead (it happens to the best of us), or your water was too hot or too cold. The water should feel comfortably warm, like a nice bath – not hot enough to hurt your finger, but warmer than room temperature.
Step 2: Building the Dough
Once your yeast is happy and foamy, it's time to build the dough. In a large mixing bowl, combine the bread flour and salt. Make a well in the center and pour in the yeast mixture along with the vegetable oil.
Now comes the fun part – mixing everything together! Start with a wooden spoon, but don't be afraid to get your hands in there once things start coming together. The dough should be slightly sticky but not wet. If it's too dry, add a tablespoon of water at a time. If it's too wet, sprinkle in a bit more flour.
Step 3: Kneading Like a Pro
Turn that shaggy dough out onto a lightly floured surface and start kneading. This is where the magic happens – you're developing the gluten that'll give your bagels their perfect texture.
Knead for about 8-10 minutes until the dough becomes smooth and elastic. It should feel slightly firm and spring back when you poke it. Don't worry if your arms get tired – this is a workout, but it's worth it!
Here's a pro tip: the dough is ready when you can stretch a small piece thin enough to see through without it tearing. Bakers call this the "windowpane test," and it's your guarantee that you've developed enough gluten.
Step 4: The First Rise
Place your beautiful dough in a lightly oiled bowl, cover it with a damp towel or plastic wrap, and let it rise in a warm place for about 1-2 hours. You want it to roughly double in size.
While you're waiting, this is the perfect time to prepare your cinnamon crunch topping. Mix together the sugar, cinnamon, brown sugar, vanilla, melted butter, and pecans (if using) in a small bowl. Set it aside – we'll need it later.
Step 5: Shaping the Bagels
Once your dough has doubled, punch it down (so satisfying!) and turn it out onto a lightly floured surface. Divide it into 8 equal pieces – a kitchen scale makes this super easy, but eyeballing it works too.
Here's where people often get tripped up: there are two ways to shape bagels. You can roll each piece into a rope and join the ends, or you can flatten each piece into a disk and poke a hole through the middle with your finger. I prefer the finger method because it gives more consistent results.
Make sure your holes are bigger than you think they need to be – they'll shrink during rising and baking. About 2 inches in diameter is perfect.
Step 6: The Second Rise
Place your shaped bagels on parchment-lined baking sheets, cover them with a damp towel, and let them rise for another 30-45 minutes. They should look puffy but not doubled in size.
Meanwhile, preheat your oven to 425°F and get a large pot of water boiling with the honey and baking soda. The water should be at a rolling boil – we want those bagels to get a good shock when they hit the water!
Step 7: The Boiling Bath
This is the step that separates bagels from regular bread, and honestly, it's kind of fun! Carefully lower 2-3 bagels at a time into the boiling water. They should float to the surface almost immediately.
Boil for 1 minute on each side, then remove with a slotted spoon and place back on the parchment-lined baking sheets. The bagels will look shiny and slightly smaller – that's exactly what we want!
Step 8: Adding the Cinnamon Crunch Magic
While the bagels are still wet from their boiling bath, brush them with beaten egg and generously sprinkle with the cinnamon crunch mixture. Don't be shy here – this topping is what makes these bagels special!
Press the topping gently into the surface so it sticks well. Any excess will fall off during baking, but that's okay – it'll create delicious crispy bits on your baking sheet.
Step 9: The Final Bake
Into the oven they go! Bake for 20-25 minutes until the bagels are golden brown and sound hollow when tapped on the bottom. The cinnamon topping should be caramelized and smelling absolutely divine.
Let them cool on a wire rack for at least 15 minutes before slicing. I know it's torture to wait, but hot bagels are gummy inside – trust me on this one!
Pro Tips That'll Make You Look Like a Bagel Master
Temperature Control Is Everything
Water temperature is crucial for both the yeast and the boiling step. Too hot, and you'll kill the yeast or cook the outside of your bagels too quickly. Too cool, and nothing will happen properly. Invest in a kitchen thermometer if you don't have one – it's a game-changer.
The Overnight Trick
Want to make your morning easier? After shaping the bagels, you can refrigerate them overnight before boiling and baking. This actually improves the flavor and makes the timing more flexible. Just let them come to room temperature for about 30 minutes before boiling.
Storage and Reheating Secrets
Fresh bagels are best eaten within 24 hours, but they freeze beautifully! Slice them before freezing so you can toast them straight from the freezer. For day-old bagels, a quick toast brings back that perfect texture.
Troubleshooting Common Bagel Disasters
When Things Go Wrong (And How to Fix Them)
Dense, Heavy Bagels: This usually means the yeast wasn't active or the dough was overworked. Make sure your water temperature is right and don't knead too aggressively.
Bagels That Spread Instead of Rise: The dough was probably too wet or under-kneaded. Next time, use a bit less water and knead a bit longer.
Toppings That Fall Off: The bagels weren't wet enough when you added the topping, or you didn't press it in well enough. That egg wash is crucial for helping everything stick!
Making It Work With What You've Got
Don't have a large pot for boiling? A wide, deep skillet works too – just work in smaller batches. No bread flour? All-purpose will do, but add an extra tablespoon to account for the lower protein content.
Creative Variations to Keep Things Interesting
Beyond Basic Cinnamon Crunch
Once you've mastered this Step-by-Step Cinnamon Crunch Bagel Recipe, the world is your oyster! Here are some fantastic variations:
Apple Cinnamon: Add diced apples to the cinnamon mixture for extra texture and flavor.
Maple Pecan: Replace the vanilla with maple extract and double the pecans.
Chocolate Chip: Fold mini chocolate chips into the dough and top with cinnamon crunch.
Savory Options: Skip the sweet topping and try everything seasoning, sesame seeds, or poppy seeds instead.
Seasonal Twists
Fall calls for pumpkin spice bagels with a brown butter crunch topping. Winter begs for gingerbread-spiced bagels with crystallized ginger. Spring and summer? Try lemon-poppy seed or blueberry variations.
Serving Suggestions That'll Impress Everyone
Making Every Bagel Special
These cinnamon crunch bagels are fantastic on their own, but here are some ways to take them to the next level:
Classic Cream Cheese: Let it come to room temperature for easy spreading, or whip it with a bit of honey for extra sweetness.
French Toast Style: Slice day-old bagels thick and use them for the most amazing French toast you've ever had.
Bagel Bread Pudding: Use leftover bagels to make an incredible bread pudding with custard and more cinnamon.
The Science Behind the Perfect Bagel
Why Each Step Matters
Understanding the "why" behind each step makes you a better baker. The boiling step gelatinizes the starches on the surface, creating that characteristic chew. The egg wash helps browning and gives the crust its shine. The high-gluten flour provides structure that can withstand the boiling process.
Even the hole serves a purpose beyond aesthetics – it ensures even cooking by increasing the surface area and allowing heat to penetrate the center more easily.
Conclusion
This Step-by-Step Cinnamon Crunch Bagel Recipe transforms your kitchen into a professional bakery, delivering restaurant-quality bagels with that irresistible cinnamon crunch topping that'll have everyone asking for seconds. While the process takes some time and patience, the results are absolutely worth every minute of effort. From the satisfying chew of perfectly developed dough to the sweet, crunchy exterior, these bagels represent the perfect weekend baking project that yields delicious rewards for days to come.
Frequently Asked Questions
1. Can I make these bagels without a stand mixer?
Yes! Hand-kneading works perfectly fine, though it requires more elbow grease and time.
2. How long do homemade bagels stay fresh?
Fresh bagels are best within 24 hours but stay good for 3 days stored properly.
3. Can I freeze the dough before shaping?
Yes, freeze after the first rise, then thaw overnight and continue with shaping steps.
4. What if I don't have bread flour?
All-purpose flour works but add an extra tablespoon for better gluten development and chew.
5. Why do my bagels sink in the boiling water?
Under-proofed dough will sink; make sure your second rise is complete before boiling.
Stay up to date with our latest ideas!


